Making a Jasika Blazer, Part 2: Making a Muslin + Assessing My Fit
TLDR: I made a muslin and decided to make the following changes to my Jasika Blazer pattern pieces:
-
Lengthen the sleeves and bodice by 1”
-
Increase the seam allowance at the waist seams—front and back—to slim the waist
-
Slim the sleeves, starting just below the armpit
-
Do a sway back adjustment (take out about 2” total from the back)
-
Rotate the sleeves forward at the shoulder approximately 3/4” (without changing the shoulder seam of the bodice) to accommodate forward shoulders.
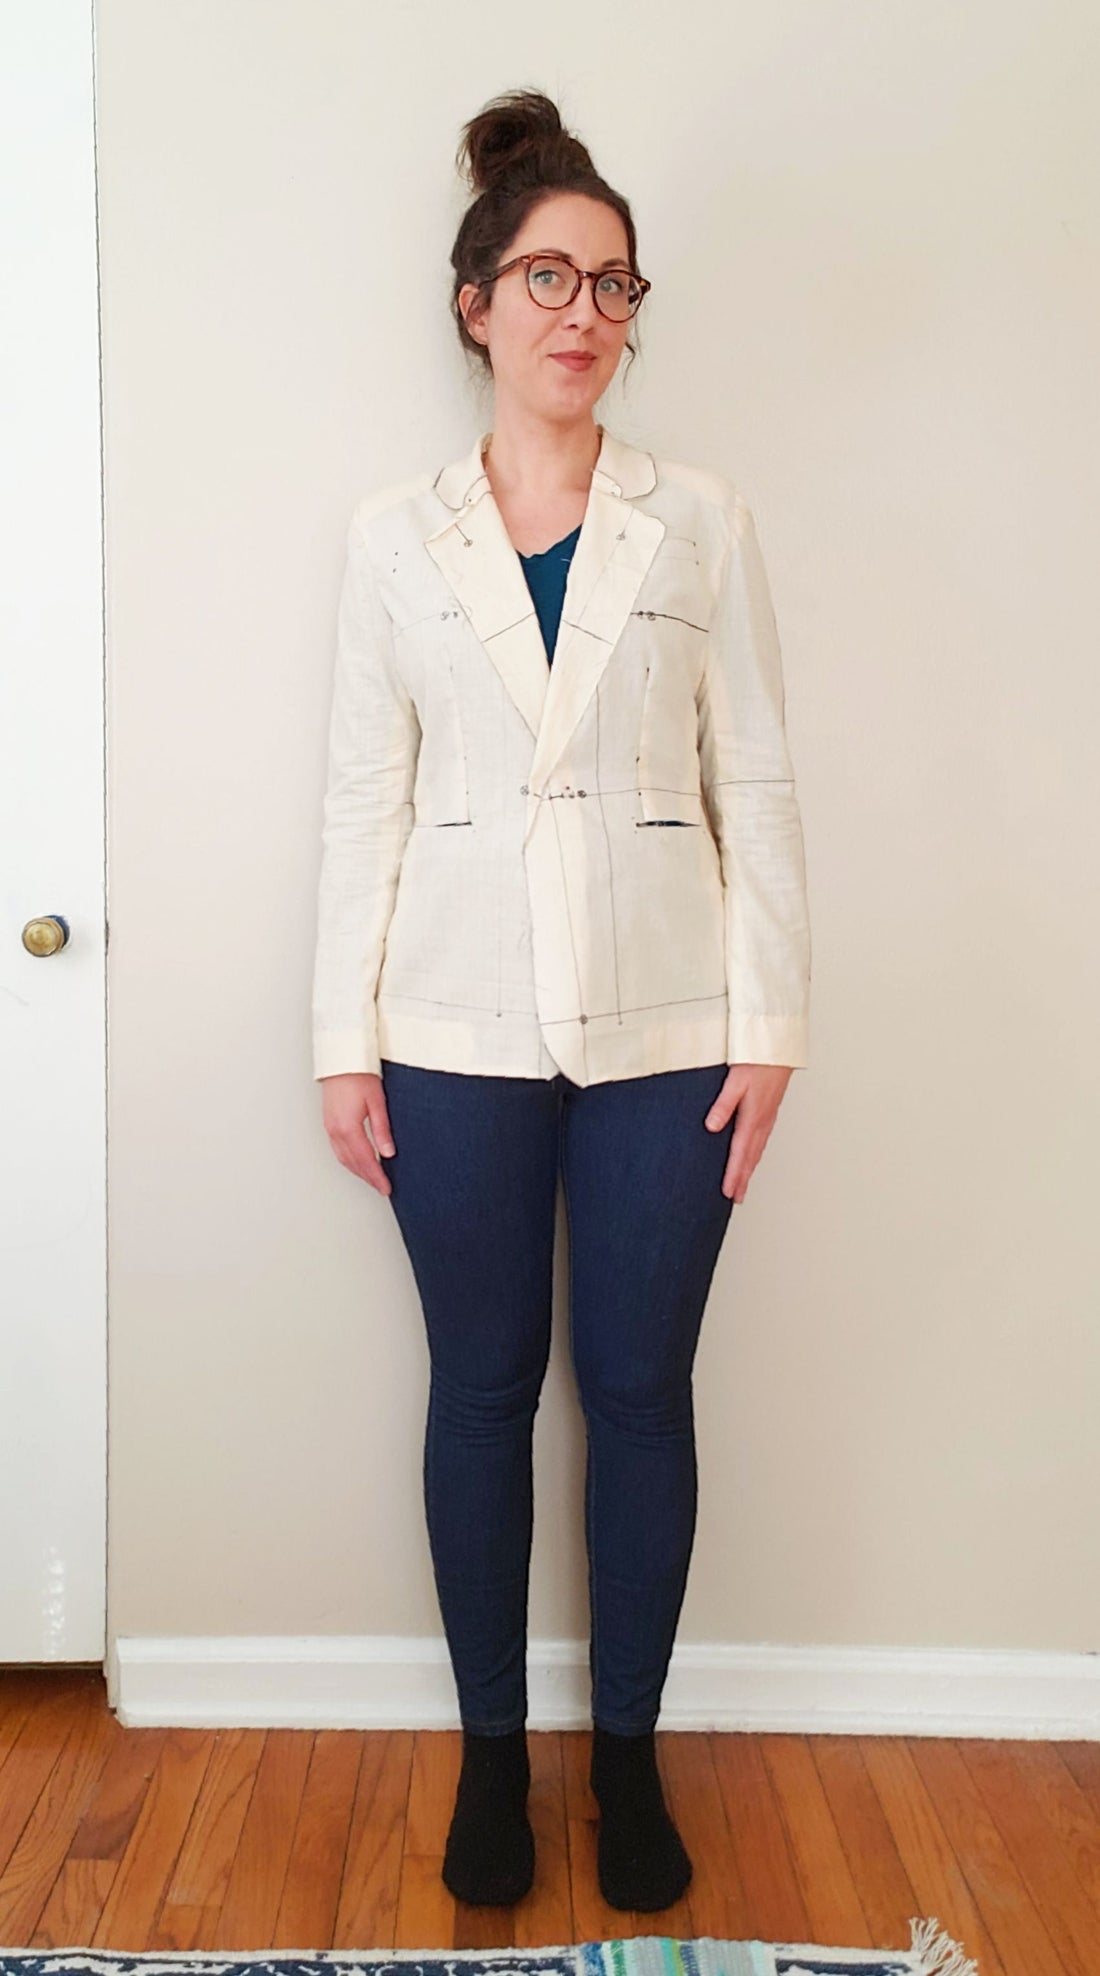
The photos below show the muslin in three stages:
-
Initial construction with only the length added to the bodice and sleeves
-
Waist and sleeve slimming with initial slimming of center back seam (which made things funky in the back!)
-
Rotated sleeve and did a proper sway back adjustment. Also slimmed the waist at the back.
I tend to be a jump-right-in kind of sewist (and maker, in general). Most of the time, this serves me well, and I get a LOT done in a short amount of time. Some call it impatience…I call it time management. Tomato, tomato.
At the end of 2018, I sewed up a Bellatrix Blazer from Papercut Patterns without making a muslin first. And while it looks nice, the fit is just a little off. I made a few modifications on the fly without testing the fit first. So, long story short, I have only worn it ONCE. And every time I look at it, I feel a slight tinge of shame for making something really nice in a beautiful corduroy fabric that I never wear.
For the Jasika Blazer, I decided I would not let that happen again! Closet Case made the construction process very approachable and fun by offering loads of fitting resources (which you can have access to by signing up for their email newsletter). AND they made it very clear that a muslin is simply indispensable. So here we go!
For my muslin, I used some basic cotton muslin fabric I had laying around (I never buy fabric like this but did one day a few months ago on a whim…possibly because it was on sale at JoAnn Fabrics?). The only necessary pieces for the muslin phase were the most basic body, sleeve, and collar pieces of the pattern—just enough to get the thing on my body for a visual reference of where I needed to make changes.
I have to be honest: I was kind of dreading this process, but once I got my size traced onto tracing paper, and then transferred to the fabric, I found it to be quite satisfying. I ended up tracing the pattern directly onto my fabric with a sharpie (a tip I picked up several weeks ago watching Closet Case’s stories on Instagram). So now I have these freaking amazing working muslin pattern pieces with all kinds of marks on them. My architectural brain is firing on all synapses.
(Did you know that I was an architect in a former life? Apparently, designing buildings and figuring out how they fit together didn’t really scratch my creative itch—but clothing? YES, PLEASE!)

All my muslin pieces marked and cut!
My Sizing Details
First off, a note on sizing: It’s been a tiny challenge to accept my measurements, not really because I am ashamed of them, but because ready-to-wear sizing is usually numbered smaller (aka, vanity sizing), and most RTW clothing is a straight size that fits funny in at least one place (usually the hips). So I’ve grown accustomed to either fitting my hips and taking a RTW garment in, or fitting the rest of my body and having it be kinda snug in the hips to get myself into a smaller size. And all of this sometimes makes me second guess pattern sizing because it is always numbered “larger” than what I buy in stores.
When making my own garments, I’ve found that I usually have to take in a little more than the seam allowance for the sizes I measure off of pattern packaging (mainly in the waist and the transition areas around the hips). However, even knowing this, I always start with a size range that is indicated on the pattern even if it’s a little loose at first. I know I can keep trimming, but I can’t add that fabric back on!
My measurements:
-
High Bust: 36” (~ 91.5cm)
-
Bust: 37.5” (~ 95cm)
-
Waist: 30” (~ 76cm)
-
Hips: 44” (~ 112cm)
-
Height: 5’-9” (~ 175cm)
My measurements put me in the size 12 range in the bust and waist and size 16 in the hips (as a reference, I am usually in the size 8 to 12 range in RTW clothing). So I went with a 12 and graded to a 16 in the hips.
Constructing the Muslin
Initially, I lengthened the sleeves and the bodice by 1”, which I do for every pattern as a starting point because I have a long torso and arms. After sewing all of the pieces together, I’m happy with the length of the sleeves. Initially I thought the bodice length ended up being a tad too long, but you’ll see in my notes below that other fitting adjustments made the length feel more spot on. Overall, the initial fit was pretty dang good! Here’s my first go at the muslin with all the aforementioned sizing and modifications included (I tried on the blazer with shoulder pads inserted):

1a: needs more shape at the waist

1b: back is mostly ok, but needs sway back adjustment to remove bulk

1c: lack of shape at waist/back
I decided to taper the back center seam to remove the little bit of bulk at the lower back—this did not really work. You can see below that there is still some “bagging” at the back and a proper sway back adjustment is necessary. I also took in the side seams at the waist at the front to give that a little more shape, and took in the front seam of the sleeves to get a slightly slimmer fit. I may slim the sleeve more once I sew it up in my tweed fabric, but I want to see how the fabric moves and stretches first and this is an easy enough adjustment to make as I go.

2a: happy with waist shape now

2b: tried shaping the center seam, but this did not reduce bulk in back

2c: profile is much better, but noticing tugging lines at the shoulder

Tried shortening the hem length…too short!
I took a photo with the length hemmed about two inches (pictured to the left) and felt that it made the blazer look too small for me. So I took that out in the next round. I just had to see! :)
For my last round of muslin adjustments, below, I rotated the sleeve forward about 3/4” (I noticed a some stress lines at the shoulder/arm in the above photos, apparently I have forward shoulders!). I didn’t want to alter the seam allowance on the top of the shoulder because I didn’t notice any tugging in that area, just the top of the sleeve. I think this alteration worked well!
I also decided to undo the center back seam, re-sew it at the original seam allowance, and do a sway back adjustment. Which worked like a charm (which is hard to tell in the photo, but it is much better)!! This adjustment always amazes me (I knew this, why didn’t I just start there?!)! I ended up pinching out almost 2” from the center back and tapered it to the front of the side panels. Then I slimmed the waist/side seams at the back. So much cleaner!
Also, a note on my muslin fabric: this fabric is a lighter weight than my jacket fabric AND since it’s not lined, it kind of sticks to my shirt underneath, making it hard to get everything perfectly smooth for photos. But the overall shape and fit feels great!

3a: No changes to the front for this round

3b: sway back adjustment to take out a little bulk while maintaining original seam allowance at center seam.

3c: side profile lookin good!
The subtle changes that I made to the muslin really make a difference in the fit! I took my time with the alterations and walked away several times when I started feeling lazy about making any more changes, or going back to what I started with to re-assess (“Oh, this is GOOD ENOUGH…I don’t need it to fit perfect!”). Usually after taking a break, I have a renewed stamina for sewing challenges! For the slimming at the waist and arms, I probably could have done these on the fly while making the actual jacket. But the sway back is good to know going in because I’ll have to alter the pattern piece before cutting my fabric.
What I am trying to say is: I’m glad I did the muslin!
And taking photos was a huge help in this process, especially for the back and sides—I highly recommend it.
Next, I will mark (with a new color) the new seam lines and take the whole thing apart to use as a reference for cutting the pattern. Closet Case provided a fantastic muslin fitting guide to make notes on that I plan to use to stay organized (sign up for their newsletter to get it!).
Woohoo! Almost time to cut fabric!